Thứ Hai, 28 tháng 7, 2025

Công thức làm bánh Mousse Red Velvet tráng gương đỏ

Red Velvet Mousse cake & Mirror Glaze siêu lung linh không chđẹp rực rỡ mà còn mềm mịn mát lạnh, vị chua nhẹ từ cream cheese hòa quyện cùng lớp bông lan mềm xốp đậm đà.

cong-thuc-lam-banh-mousse-red-velvet-trang-guong-do-thumb

Nguyên liu làm bông lan Red Velvet - Công thức Sponge cake

  • 160g bột mì đa dụng
  • 200g đường
  • 1 muỗng canh bột cacao
  • ½ muỗng cà phê baking soda
  • ½ muỗng cà phê muối
  • 1 quả trứng lớn
  • 120ml buttermilk
  • 120ml dầu ăn
  • 1 muỗng cà phê giấm trắng
  • 1 muỗng cà phê vani
  • 1 muỗng canh màu thực phẩm đỏ 

Nguyên liệu làm lp Mousse phô mai

  • 300ml whipping cream (lạnh)
  • 225g cream cheese (mềm)
  • 60g đường bột
  • 1 muỗng cà phê vani
  • 1 muỗng canh bột gelatin (= 3 lá) + 3 muỗng canh nước lạnh
nguyen-lieu-lam-banh-mousse-red-velvet-trang-guong-do

Nguyên liu làm lp tráng gương đ (Mirror Glaze)

  • 120ml nước
  • 200g đường
  • 150g sữa đặc có đường
  • 1 muỗng canh gelatin (= 3 lá) + 3 muỗng canh nước
  • 130g chocolate trắng, băm nh
  • Màu thực phẩm đ dạng gel

Nguyên liệu trang trí

  • Kem tươi đánh bông
  • Miếng hoặc vụn chocolate đen
  • Đường bột (tùy chọn)

Cách làm Red Velvet Mousse cake phủ gương đỏ lung linh

Phần 1: Làm bông lan Red Velvet - Công thức Sponge cake

Bước 1.      Làm nóng lò nướng175°C. Lót giấy nến và xịt chống dính cho khuôn xo tròn 8 inch (20cm).
Bước 2.      Trong một cái vừa, rây mịn và trộn đều các nguyên liệu khô gồm bột mì đa dụng, bột cacao không đường, baking soda, muối nở và muối.

cong-thuc-lam-banh-mousse-red-velvet-trang-guong-do-2

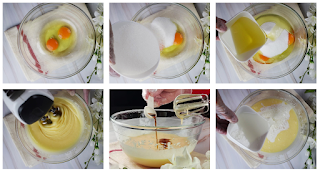
Bước 3.      Trong một cái lớn, đánh trứng và đường kính trắng cho đến khi nhạt màu xốp. Từ từ cho dầu thực vật, sữa bơ, màu thực phẩm đ và tinh chất vani vào, trộn đều.
cong-thuc-lam-banh-mousse-red-velvet-trang-guong-do-1

Bước 4.      Từ từ cho hỗn hợp nguyên liệu khô vào hỗn hợp ướt, trộn ở tốc độ thấp cho đến khi vừa hòa quyện. Thêm giấm trắng và trộn nhanh.

cong-thuc-lam-banh-mousse-red-velvet-trang-guong-do-3

Bước 5.      Đổ khối bột vào khuôn đã chuẩn bị và nướng trong 25-30 phút, hoặc cho đến khi que tăm xiên vào rút ra sạch. Để bánh nguội hoàn toàn trên vlàm nguội. Sau khi nguội, cắt bỏ phần trên cùng của bánh để tạo bề mặt phẳng (giữ lại phần vụn bánh đtrang trí). Cắt bánh thành hai lớp bằng nhau.

cong-thuc-lam-banh-mousse-red-velvet-trang-guong-do-4

Phần 2: Làm lp Mousse phô mai - Công thức làm bánh Mousse Red Velvet

Bước 1.      Trong một cái tô nhỏ, cho gelatin vào nước lạnh và để yên 5 phút cho nở. Sau đó, đun chảy gelatin bằng cách cho vào lò vi sóng khoảng 10-15 giây hoặc đun cách thủy cho đến khi tan hoàn toàn. Để nguội một chút.
cong-thuc-lam-banh-mousse-red-velvet-trang-guong-do-5

Bước 2.      Đổ sữa vào nồi cỡ vừa và đun sôi. Vắt bớt nước thừa trong gelatin, cho sữa nóng vào và khuấy đều cho gelatin tan hết trong sữa.
Bước 3.      Đánh kem phô mai (cream cheese) trong một bát khác cho đến khi mềm, mịn và sánh, thêm vani và whipping cream vào, đánh lại cho đến khi hỗn hợp mịn và bông mềm.

cong-thuc-lam-banh-mousse-red-velvet-trang-guong-do-6
cong-thuc-lam-banh-mousse-red-velvet-trang-guong-do-7

Bước 4.     Từ từ đổ gelatin đã tan chảy và nguội vào hỗn hợp kem phô mai, trộn đều. Sau đó, nhẹ nhàng fold kem tươi đánh bông vào hỗn hợp kem phô mai cho đến khi hòa quyện.

Bước 3: Ráp bánh Mousse Red Velvet 

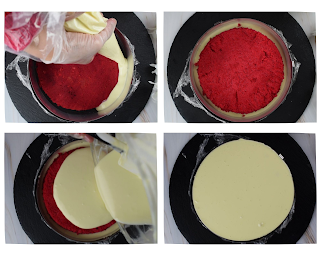
Bước 1.      Đặt một lớp bánh bông lan Red Velvet vào đáy khuôn lò xo sạch 8 inch. Đổ một nửa lượng mousse phô mai kem lên trên lớp bánh, dàn đều.
Bước 2.      Đặt lớp bánh bông lan thứ hai lên trên lớp mousse. Đổ phần mousse phô mai kem còn lại lên trên, dàn phẳng bề mặt.

cong-thuc-lam-banh-mousse-red-velvet-trang-guong-do-8
Bước 3.      Bọc kín khuôn bằng màng bọc thực phẩm và làm lạnh trong tủ lạnh ít nhất 4-6 giờ, hoặc tốt nhất là qua đêm, để mousse đông lại hoàn toàn.

Bước 4: Làm lp tráng gương đ (Mirror Glaze)

Bước 1.      Ngâm gelatin với nước.
Bước 2.      Đun nước, đường và sữa đặc cho đến khi nóng.

cong-thuc-lam-banh-mousse-red-velvet-trang-guong-do-9
cong-thuc-lam-banh-mousse-red-velvet-trang-guong-do-10

Bước 3.      Tắt bếp, cho chocolate trắng và gelatin đã nở vào. Khuấy tan hoàn toàn.
Bước 4.      Dùng máy xay cầm tay xay mịn, thêm màu đỏ.
Bước 5.      Để nguội đến khoảng 32°C (90°F) trước khi rót lên bánh.

Bước 5: Trang trí và hoàn thiện bánh Mousse Red Velvet tráng gương đỏ

Bước 1.      Khi bánh đã đông hoàn toàn, nhẹ nhàng ly bánh ra khi khuôn.
Bước 2.      Đổ lớp tráng gương đmirror glaze đã nguội lên trên mặt bánh, dàn đều hoặc để chảy tự nhiên xuống các cạnh. Trang trí bằng kem tươi, socola, đưng bt xung quanh viền bánh hoặc trên bề mặt.
cong-thuc-lam-banh-mousse-red-velvet-trang-guong-do-11
Bước 3.      Đặt bánh vào tủ lạnh thêm ít nhất 30 phút đlớp tráng gương đỏ mirror glaze đông lại trước khi cắt và thưởng thức.
cong-thuc-lam-banh-mousse-red-velvet-trang-guong-do-12

Chúc các bạn thành công với công thức làm bánh Mousse Red Velvet tráng gương đ ngon miệng và đẹp mắt này!!!

Thứ Ba, 22 tháng 7, 2025

Làm bánh bông lan bằng bột bình tinh - thành công ngay lần đầu vì nguyên liệu khác biệt

Bạn muốn tự tay làm một chiếc bánh bông lan mềm xốp, tan chảy trong miệng mà vẫn tốt cho sức khỏe? Với công thức cách làm bánh bông lan bằng bột bình tinh dưới đây, bạn sẽ dễ dàng tạo ra món bánh thơm ngon ngay tại nhà. Bánh bông lan bột bình tinh không chỉ có kết cấu đặc biệt mà còn mang lại hương vị thanh thoát, nhẹ nhàng. Nh bột bình tinh giúp cốt bánh xốp hơn làm từ bột mì và không lo biến đổi gen và gluten.

lam-banh-bong-lan-bot-binh-tinh-thumb

Nguyên liệu làm bánh bông lan bột bình tinh

Để làm món bánh bông lan này, bạn cần chuẩn bị những nguyên liệu sau:

  • 4 lòng đỏ trứng gà
  • 4 lòng trắng trứng gà
  • 40g sữa tươi không đường hoặc sữa ít đường, sữa hạt
  • 40g dầu ăn
  • 80g bột bình tinh
  • 60g đường
  • ½ thìa nước cốt chanh
  • Xíu muối
lam-banh-bong-lan-bot-binh-tinh-2 

Chi tiết cách làm bánh bông lan bột bình tinh

Thực hiện cách làm bánh bông lan bột bình tinh theo các bước sau đđảm bảo thành công:

Bước 1: Trộn hỗn hợp lòng đỏ trứng làm bánh bông lan bột bình tinh

Đánh đều lòng đỏ trứng gà. Sau đó, từ từ đổ sữa tươi và dầu ăn vào, tiếp tục đánh đều cho đến khi hỗn hợp hòa quyện.

Bước 2: Thêm bột bình tinh - nguyên liệu tốt cho sức khỏe

Rây từ từ bột bình tinh vào hỗn hợp lòng đỏ ở Bước 1. Dùng phới hoặc vá nhựa múc cơm trộn đều cho đến khi hỗn hợp mịn, không còn vón cục.

Bước 3: Đánh bông lòng trắng trứng làm bánh bông lan bột bình tinh

Dùng máy đánh trứng đánh lòng trắng trứng với một xíu muối và nước cốt chanh. Khi hỗn hợp bắt đầu nổi bọt li ti, từ từ đđường vào và tiếp tục đánh. Đánh cho đến khi hỗn hợp lòng trắng thật bông, khi nhấc que đánh lên thấy chóp đứng là đạt.

Bước 4: Trộn hỗn hợp làm bánh bông lan bột bình tinh

lam-banh-bong-lan-bot-binh-tinh-3

Lấy 1/3 lượng lòng trắng trứng đã đánh bông cho vào hỗn hợp lòng đỏ ở Bước 2. Dùng vá nhựa hoặc phới dẹt nhẹ nhàng trộn đều theo một chiều để giữ độ bông. Sau đó, cho nốt 2/3 lượng lòng trắng còn lại vào và tiếp tục trộn nhẹ nhàng cho đến khi toàn bộ hỗn hợp hòa quyện đồng nhất.

Bước 5: Chuẩn bị nướng bánh bông lan bằng bột bình tinh - thành công ngay lần đầu

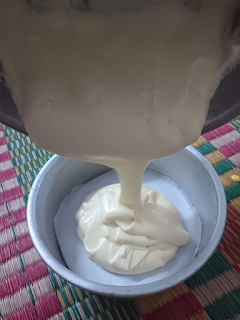
Đổ hỗn hợp bột vào khuôn bánh đã lót sẵn giấy nến dưới đáy. Dàn phẳng mặt bánh (có thể dùng tăm xỉa răng để dàn). Gõ nhẹ khuôn bánh xuống nền nhà vài cái để loại bỏ bọt khí lớn, sau đó cho vào lò nướng đã làm nóng.

lam-banh-bong-lan-bot-binh-tinh-4 lam-banh-bong-lan-bot-binh-tinh-1

Bước 6: Nướng bánh bông lan bằng bột bình tinh

Bật lò nướng ở nhiệt độ 140 độ C, bật cả hai lửa (trên và dưới), nướng trong khoảng 60 phút.

Bước 7: Hoàn thành và thưởng thức bánh bông lan bột bình tinh

 lam-banh-bong-lan-bot-binh-tinh-5 lam-banh-bong-lan-bot-binh-tinh-6

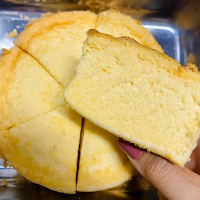
Sau khoảng 55 phút, bạn có thể hé nhẹ cửa lò nướng ra một chút để giảm nhiệt. Khi đủ 60 phút, lấy bánh ra khỏi lò. Đợi bánh nguội bớt rồi thưởng thức ngay món bánh bông lan bột bình tinh mềm mịn, thơm ngon do chính tay mình làm. 

lam-banh-bong-lan-bot-binh-tinh-7lam-banh-bong-lan-bot-binh-tinh-8

Ngoài cách làm bánh bông lan bằng bột bình tinh với khuôn đế rời trên đây, các bạn cũng có thể sử dụng công thức và làm khuôn chữ nhật để cuộn bánh nhân kem mứt cũng rất ngon nhé. Cốt bánh bông lan bình tinh mềm ẩm nên rất dễ cuộn mà không bị nứt. Chúc bạn thành công!

Thứ Sáu, 18 tháng 7, 2025

Crispy Vietnamese Pig's Ear Cookies (Bánh Tai Heo): A Traditional Snack

Craving a unique and delightful treat? Discover how to make traditional Bánh Tai Heo, also known as Vietnamese Pig's Ear Cookies. These iconic spiral-patterned cookies offer an irresistible crunch and a subtly sweet flavor, making them a popular snack across Vietnam. Perfect for tea time, gatherings, or simply a comforting bite of Vietnamese heritage, our recipe will guide you to crispy perfection.

crispy-vietnamese-pigs-ear-cookies-banh-tai-heo-1

Ingredients for Authentic Bánh Tai Heo

For the Plain Dough (White Dough)

  • 170g (approx. 1 ⅓ cups) All-Purpose Flour
  • 3 tbsp Granulated Sugar
  • 1 Egg Yolk, beaten
  • 50ml (approx. ¼ cup) Coconut Milk or Fresh Milk
  • 20g (approx. 1.5 tbsp) Unsalted Butter, melted
  • 1 tsp Lemon Juice
  • Pinch of Salt

For the Cocoa Dough (Dark Dough)

  • 70g (approx. ½ cup) All-Purpose Flour
  • ½ tsp Unsweetened Cocoa Powder (adjust for desired color/flavor)
  • 2/5 of the Liquid Mixture from Plain Dough (see instructions)

Other ingredients

  • Cooking Oil (enough for deep-frying)
  • Sesame Seeds (for extra crunch)

Instructions for Making Crispy Bánh Tai Heo

Step 1: Prepare the Liquid Base
In a small bowl, whisk together 3 tbsp granulated sugar, 50ml coconut milk (or fresh milk), 1 beaten egg yolk, 20g melted butter, 1 tsp lemon juice, and a pinch of salt. Ensure the sugar is fully dissolved. This will be your liquid base for both doughs.

crispy-vietnamese-pigs-ear-cookies-banh-tai-heo-2

Step 2: Prepare the Two Doughs (Plain & Cocoa)
Plain Dough: In a large bowl, combine 100g all-purpose flour with 3/5 of the liquid mixture prepared in Step 1. Mix well until the flour absorbs all the liquid, then knead until you form a smooth, pliable, non-sticky dough. This will be your lighter-colored dough.

crispy-vietnamese-pigs-ear-cookies-banh-tai-heo-3

Cocoa Dough: In a separate bowl, combine the remaining 70g all-purpose flour with ½ tsp unsweetened cocoa powder. Add the remaining 2/5 of the liquid mixture from Step 1. Mix well until the flour absorbs the liquid, then knead into a smooth, chocolate-colored dough.

Step 3: Shape the Signature Spiral
Roll the Doughs: On a lightly floured surface, use a rolling pin to roll out each dough (plain and cocoa) into a thin rectangle, approximately 0.5 cm (0.2 inches) thick and similar in size.

Layer and Roll: Carefully place the cocoa dough rectangle on top of the plain dough rectangle. You can brush a tiny bit of water between the two layers to help them stick better. Tightly roll the layered dough from one long side into a compact cylinder.

crispy-vietnamese-pigs-ear-cookies-banh-tai-heo-4

Chill the Dough: Wrap the dough cylinder tightly in plastic wrap (cling film) and refrigerate for at least 2 hours (or preferably overnight). Chilling is crucial as it makes the dough firm and much easier to slice thinly.

Pro Tip: For extra sesame flavor and crunch, sprinkle some sesame seeds onto the dough before the final rolling, and lightly press them in with the rolling pin to ensure they adhere.

Step 4: Slice the Cookies

crispy-vietnamese-pigs-ear-cookies-banh-tai-heo-5

Remove the chilled dough cylinder from the refrigerator. Using a very sharp knife, slice the dough into very thin pieces, ideally less than 0.2 cm (0.08 inches) thick. The thinner the slices, the crispier your Bánh Tai Heo will be.

Step 5: Fry to Crispy Perfection
Heat the Oil: Pour enough cooking oil into a pan to cover the bottom by about one finger's width (approximately 2-3 cm or 1 inch deep). Heat the oil over medium heat. To test if the oil is hot enough, insert a wooden chopstick; if tiny bubbles form around it, the oil is ready.

Fry the Cookies: Carefully drop the sliced Bánh Tai Heo into the hot oil in batches, making sure not to overcrowd the pan. Fry quickly, as these thin cookies cook very fast.

crispy-vietnamese-pigs-ear-cookies-banh-tai-heo-6

Achieve the Curl: When the cookies start to curl into their characteristic "pig's ear" shape (curving inwards), flip them over and fry for a few more seconds on the other side.

Drain & Cool: Remove the cookies from the oil when they are lightly golden (the plain dough portion should remain light yellow). Place them on a plate lined with paper towels to drain excess oil.

Alternative (Baked Bánh Tai Heo): If you prefer a less oily option, you can bake these cookies at 180°C (350°F) for about 10 minutes, though they might not achieve the signature curl as prominently as when fried.

Step 6: Serve and Store
Allow the Bánh Tai Heo to cool completely to room temperature before serving. They will become crispier as they cool. Store the crispy cookies in an airtight container at room temperature for up to a week to maintain their crunch.

Authentic Vietnamese Savory Pyramid Dumplings (Bánh Giò)

Authentic Vietnamese Savory Pyramid Dumplings (Banh Gio) with Pork & Mushroom Filling.

Craving a taste of Vietnam? Learn how to make traditional Bánh Giò at home! These iconic savory pyramid dumplings feature a soft, translucent rice flour dough encasing a flavorful filling of ground pork, wood ear mushrooms, and shallots, all lovingly steamed in fragrant banana leaves. Perfect for a hearty breakfast or a satisfying snack, this homemade Bánh Giò recipe brings a beloved Vietnamese street food classic to your kitchen.

authentic-vietnamese-savory-pyramid-dumplings-banh-gio-1a

Ingredients for Homemade Bánh Giò

For the Dough (Outer Layer)

  • 500g (approx. 4 cups) Rice Flour (Bột gạo tẻ - essential for the signature texture)
  • 50ml Cooking Oil (for dough and wrapping)
  • 1 tsp Salt
  • ~1.5 - 2 liters Water or Pork Broth (adjust as needed for consistency)
authentic-vietnamese-savory-pyramid-dumplings-banh-gio-2a

For the Savory Pork & Mushroom Filling

  • 300g Ground Pork (lean pork shoulder recommended)
  • 50g Dried Wood Ear Mushrooms (mộc nhĩ - adds a unique texture)
  • 2-3 Shallots, finely minced
  • 2 tbsp Fish Sauce (Nước mắm - for authentic Vietnamese flavor)
  • 1 tsp Sugar (or to taste)
  • ½ tsp Ground Black Pepper (or to taste)
  • 2 tbsp Cooking Oil (for sautéing filling)

For Wrapping & Steaming

  • Fresh Banana Leaves (lá chuối - crucial for aroma and shape)
  • Pandan Leaves (optional, for extra fragrance during steaming)
  • Kitchen Twine or Rubber Bands (optional, for securing packages)

Instructions for Making Bánh Giò (Vietnamese Pork Dumplings)

Step1: Prepare the Savory Filling

Rehydrate Wood Ear Mushrooms: Soak dried wood ear mushrooms in warm water for 15-20 minutes until fully rehydrated and soft. Drain, then finely chop.

authentic-vietnamese-savory-pyramid-dumplings-banh-gio-3

Sauté Aromatics & Pork: Heat 2 tbsp cooking oil in a large pan or wok over medium-high heat. Add the finely minced shallots and sauté until fragrant and lightly golden. Add the ground pork, breaking it up with a spatula. Cook until the pork is no longer pink.

Season & Finish Filling: Season the cooked pork with fish sauce, sugar, and ground black pepper. Stir well. Add the chopped wood ear mushrooms and continue to stir-fry for another 2-3 minutes until heated through and well combined. Remove from heat and let the filling cool completely. This flavorful mixture is key for delicious Bánh Giò.

Step 2: Prepare the Rice Flour Dough (Bánh Giò Batter)

Combine Ingredients: In a large pot, combine the rice flour, salt, and water (or pork broth). Whisk well until there are no lumps and you have a smooth, thin batter.

authentic-vietnamese-savory-pyramid-dumplings-banh-gio-4

Cook the Dough: Place the pot over medium heat, stirring continuously with a wooden spoon or spatula. As the mixture heats, it will gradually thicken into a translucent, sticky, and smooth paste. This process can take 15-20 minutes. Continue stirring until the dough is thick enough to hold its shape but still pliable – it should resemble thick mashed potatoes. Remove from heat. Stir in 50ml cooking oil (or as per your preference) to make the dough glossy and less sticky.
Pro Tip: Constant stirring is crucial to prevent lumps and sticking. The consistency of this rice flour dough is vital for perfect Bánh Giò.

Step 3: Prepare Banana Leaves for Wrapping

authentic-vietnamese-savory-pyramid-dumplings-banh-gio-6 authentic-vietnamese-savory-pyramid-dumplings-banh-gio-5

Wash the fresh banana leaves thoroughly. To make them pliable and easy to fold without tearing, quickly blanch them in boiling water for 30 seconds to 1 minute, or gently warm them over low heat. Wipe them dry with a clean cloth. Cut the leaves into approximately 25-30 cm (10-12 inch) squares.

Step 4: Assembling the Bánh Giò

Form the Wrapper: Lay two banana leaf squares on top of each other (for extra strength, especially if leaves are thin). Lightly brush a thin layer of cooking oil on the top leaf. Fold the leaf into a cone or pyramid shape by bringing two adjacent corners together and overlapping them, creating a deep pocket.

authentic-vietnamese-savory-pyramid-dumplings-banh-gio-7 authentic-vietnamese-savory-pyramid-dumplings-banh-gio-8

Layer the Dough and Filling: Spoon about 2-3 tablespoons of the prepared rice flour dough into the bottom of the banana leaf cone, spreading it evenly. Place a generous spoonful of the savory pork and mushroom filling in the center of the dough. Cover the filling with another 2-3 tablespoons of the rice flour dough, making sure the filling is completely encased.

Seal the Dumpling: Carefully fold the remaining banana leaf over the dough and filling, sealing all edges to form a compact pyramid or rectangular packet. You can secure the packet with kitchen twine or rubber bands if desired. Repeat with the remaining dough and filling.

Step 5: Steaming the Bánh Giò

Arrange the wrapped Bánh Giò in a steamer basket. You can place a few fresh pandan leaves at the bottom of the steamer for an added aromatic touch. Bring the water in the steamer to a rolling boil. Place the steamer basket over the boiling water, cover tightly, and steam for 30-45 minutes (depending on the size of your dumplings).

authentic-vietnamese-savory-pyramid-dumplings-banh-gio-9 
Doneness Test: Bánh Giò are cooked when they feel firm to the touch, and the dough becomes translucent and glossy.

Step 6: Serving Traditional Bánh Giò

authentic-vietnamese-savory-pyramid-dumplings-banh-gio-10

Carefully remove the steamed Bánh Giò from the steamer. Let them cool slightly before unwrapping to help them firm up and retain their shape. Bánh Giò are best served warm, often with a sprinkle of extra ground black pepper and a side of Vietnamese dipping sauce (Nuoc Cham) or chili sauce. Enjoy this classic Vietnamese street food in your own home!
 

Bếp Bánh Template by Ipietoon Cute Blog Design