Thứ Hai, 26 tháng 5, 2025

Delicious Cocoa Flavored Steamed Bánh Thuẫn (Vietnamese Sponge Cake) Recipe

After sharing our pandan-flavored Bánh Thuẫn, we're excited to bring you another delightful variation: Cocoa Flavored Steamed Bánh Thuẫn! This recipe creates a beautiful two-tone cake with the warm yellow of vanilla and the rich brown of cocoa, offering a unique twist on the traditional Vietnamese sponge cake.

delicious-cocoa-flavored-steamed-banh-thuan-Vietnamese-thumb

Ingredients for Cocoa Flavored Steamed Bánh Thuẫn:

  • 200g all-purpose flour
  • 150g granulated sugar
  • 1 chicken egg
  • 1 teaspoon vanilla extract
  • 1/2 teaspoon salt
  • 1 teaspoon baking powder
  • 200ml coconut milk (unsweetened fresh milk can be substituted)
  • 1 teaspoon cocoa powder

Step-by-Step Instructions for Cocoa Flavored Steamed Bánh Thuẫn:

Follow these steps to create a beautiful and delicious two-toned Bánh Thuẫn:

Step 1: Combine All Ingredients

In a large mixing bowl, combine all the main ingredients: 200g all-purpose flour, 150g granulated sugar, 1 chicken egg, 1 teaspoon vanilla extract, 1/2 teaspoon salt, 1 teaspoon baking powder, and 200ml coconut milk.

delicious-cocoa-flavored-steamed-banh-thuan-Vietnamese-1
delicious-cocoa-flavored-steamed-banh-thuan-Vietnamese-2

Step 2: Beat the Batter Until Smooth

Using a handheld electric mixer (a whisk can be used, but it will require more time and effort), begin beating the mixture at a low speed. Gradually increase the speed and continue beating in one consistent direction. Beat for approximately 15-20 minutes until the batter becomes smooth, elastic, and flows in a thick ribbon. This extensive beating is crucial for the cake's texture.


delicious-cocoa-flavored-steamed-banh-thuan-Vietnamese-4

Step 3: Divide and Flavor the Batter

Divide the prepared batter into two portions, maintaining an approximate ratio of 20:80 (smaller portion for cocoa, larger for vanilla). Add 1 teaspoon of cocoa powder to the smaller portion of batter and stir until well combined and evenly colored. Now you have two distinct batters: a plain (vanilla-colored) batter and a cocoa batter.


delicious-cocoa-flavored-steamed-banh-thuan-Vietnamese-5

delicious-cocoa-flavored-steamed-banh-thuan-Vietnamese-6

delicious-cocoa-flavored-steamed-banh-thuan-Vietnamese-7

Step 4: Prepare Molds and Pour Batter

Lightly grease your steaming molds with cooking oil to prevent sticking. Pour the plain (vanilla-colored) batter into each mold, being careful not to fill it completely. Then, gently spoon the cocoa batter on top of the plain batter. For the classic Bánh Thuẫn "blooming" effect, use a sharp knife or skewer, dip it into the batter, and carefully make a cross-shaped cut on the surface of each cake.


delicious-cocoa-flavored-steamed-banh-thuan-Vietnamese-8

Step 5: Steam the Bánh Thuẫn

Place a pot of water on the stove and bring it to a boil. Once the water is boiling, place the molds into a steamer basket and then set the steamer basket into the pot. Steam over medium-low heat for approximately 20 minutes.


delicious-cocoa-flavored-steamed-banh-thuan-Vietnamese-9

Step 6: Cool and Serve

Once the Bánh Thuẫn are cooked through, carefully remove them from the steamer. Let them cool slightly in the molds before gently removing them.

Enjoy your delightful homemade Cocoa Flavored Steamed Bánh Thuẫn!

Fluffy Steamed Bánh Thuẫn (Vietnamese Sponge Cake) with All-Purpose Flour

Looking for a simple yet delicious Vietnamese dessert? This recipe for Steamed Bánh Thuẫn using all-purpose flour is perfect for achieving that signature fluffy, "blooming" texture! With easily accessible ingredients and clear steps, you'll be able to create this traditional treat at home. The key to its perfect rise is vigorous beating of the batter until it turns an ivory color.

fluffy-steamed-banh-thuan-vietnamese-thumb

Ingredients for Steamed Bánh Thuẫn:

  • 250g all-purpose flour
  • 200g granulated sugar
  • 2 chicken eggs
  • 10g baking powder
  • 10ml lemon juice
  • 1 teaspoon vanilla extract
  • 250ml unsweetened fresh milk (cold water can be substituted)
  • A small amount of green food coloring (e.g., pandan extract, optional)
fluffy-steamed-banh-thuan-vietnamese-3

Step-by-Step Instructions for Fluffy Steamed Bánh Thuẫn:

Follow these instructions to make your Bánh Thuẫn bloom beautifully:

Step 1: Prepare the Batter

Combine all ingredients (250g all-purpose flour, 200g granulated sugar, 2 chicken eggs, 10g baking powder, 10ml lemon juice, 1 teaspoon vanilla extract, 250ml unsweetened fresh milk) in a large mixing bowl. Using an electric mixer, start at a slow speed and gradually increase to a faster speed. Beat the mixture continuously until it transforms from a liquid consistency to a smooth, thick batter. The batter will change color from yellow to an ivory white. This extensive beating is crucial for the cake to achieve its signature airy, "blooming" texture.

Step 2: Divide and Color the Batter (Optional)

Divide the prepared batter into two portions. Add a small amount of green food coloring (such as pandan extract) to one portion to create a vibrant green color. This step is optional but adds visual appeal.

Step 3: Fill the Molds

Place paper cupcake liners into your steaming molds. Pour the plain (white) batter into each mold, filling about 2/3 of the way. Then, add the green batter on top, filling the remaining 1/3 of the mold.

fluffy-steamed-banh-thuan-vietnamese-2

Step 4: Steam the Bánh Thuẫn

Bring a pot of water to a rolling boil. Carefully place the steamer basket containing the filled molds into the pot. Steam for 16-17 minutes until the cakes are cooked through and have "bloomed" beautifully. Once cooked, turn off the heat and immediately remove the steamer basket from the pot.

fluffy-steamed-banh-thuan-vietnamese-1

Important Note: Do not over-steam the cakes, as prolonged steaming can make them tough and soggy due to condensation.

Enjoy your homemade, fluffy Steamed Bánh Thuẫn!

Thứ Sáu, 23 tháng 5, 2025

Air Fryer Baked Palm Sugar Rice Cake (Bánh Bò Thốt Nốt Rễ Tre) Recipe

 Craving a delicious Vietnamese Bánh Bò Thốt Nốt but don't have an oven? This recipe shows you how to make a perfect, airy, and flavorful palm sugar rice cake using your air fryer! Achieve that authentic "rễ tre" (bamboo root) texture with less oil.

air-fryer-baked-palm-sugar-rice-cake-thumb

Ingredients for Air Fryer Bánh Bò Thốt Nốt:

(For an oval mold, dimensions: 22cm x 11cm x 5.5cm)

  • 2 large chicken eggs
  • 145g palm sugar (cut into small pieces if using a block)
  • 185g coconut milk
  • 90g tapioca starch
  • 6g rice flour
  • 4g baking powder
  • 4g baking soda
  • 5g cooking oil
  • 3g vanilla extract
  • A small amount of unsalted butter (for greasing)
air-fryer-baked-palm-sugar-rice-cake-1

Step-by-Step Instructions for Air Fryer Bánh Bò Thốt Nốt:

Follow these instructions to bake a fantastic Bánh Bò using your air fryer:

Step 1: Prepare the Palm Sugar Syrup

Place 145g palm sugar and 10g filtered water into a pot. Bring the mixture to a boil over medium heat. Continue boiling until the palm sugar turns a deep brown color. Then, add 185g coconut milk, stir well, and remove the pot from the heat as soon as the mixture comes to a boil.

Step 2: Combine with Starches

Allow the palm sugar mixture to cool down to about 30-40°C (86-104°F) – it should feel slightly warm to the touch. Sift in 90g tapioca starch and 6g rice flour. Whisk thoroughly until the mixture is smooth and well combined.

Step 3: Add Eggs and Rest the Batter

Crack 2 chicken eggs into a bowl and whisk them well until beaten. Pour the beaten eggs into the flour mixture, along with 5g cooking oil and 3g vanilla extract. Stir the entire mixture until evenly blended. Cover the bowl with plastic wrap and let the batter rest for 20 minutes.

Step 4: Preheat Air Fryer & Mold, Incorporate Leavening Agents

While the batter is resting, preheat your air fryer to 160°C (320°F) for 10 minutes with the baking mold inside. Carefully remove the hot mold and brush a thin layer of unsalted butter on its surface. Return the mold to the air fryer and continue preheating for another 5 minutes.

air-fryer-baked-palm-sugar-rice-cake-2

Just before baking, add 4g baking powder and 4g baking soda to the batter. Stir gently until evenly distributed. Immediately and carefully (to avoid burns!) pour the batter directly into the hot baking mold.

Step 5: Air Fry and Finish Baking

Place the mold with the batter into the air fryer. Bake for the first 30 minutes at 150°C (302°F). After 30 minutes, reduce the temperature to 130°C (266°F) and continue baking for another 20 minutes. Once baked, carefully remove the Bánh Bò from the mold, let it cool completely, then slice and enjoy! For an even richer experience, serve the Bánh Bò Thốt Nốt with a drizzle of coconut cream and a sprinkle of toasted sesame seeds.


air-fryer-baked-palm-sugar-rice-cake-3

air-fryer-baked-palm-sugar-rice-cake-4

How to Make Fragrant Pandan Bánh Bò (Vietnamese Steamed Rice Cake)

Learn how to make the iconic Vietnamese Pandan Bánh Bò (Bánh Bò Lá Dứa), a deliciously fragrant and chewy steamed rice cake. Infused with the natural aroma and vibrant green color of pandan leaves, this recipe guides you through creating a delightful and authentic Bánh Bò at home.

how-to-make-fragrant-pandan-banh-bo-thumb

Ingredients for Pandan Bánh Bò:

  • 280g tapioca starch
  • 30g rice flour
  • 220ml coconut milk
  • 50ml pandan leaf extract (or pandan juice)
  • 5g baking powder
  • 1/4 teaspoon salt
  • 150g granulated sugar
  • 1 packet vanilla sugar (or 1 tsp vanilla extract)
  • 7 chicken eggs
how-to-make-fragrant-pandan-banh-bo-2

Step-by-Step Instructions for Pandan Bánh Bò:

Follow these steps to create a beautiful and aromatic Pandan Bánh Bò:

Step 1: Prepare the Baking Mold

Lightly grease your baking mold with a thin layer of cooking oil. Place the greased mold into an oven preheated to 175°C (350°F) to warm up. (Note: While this recipe mentions an oven, Bánh Bò Lá Dứa is traditionally steamed, but this preparation might suggest baking for texture or a specific type).

how-to-make-fragrant-pandan-banh-bo-3

Step 2: Dissolve Sugar in Coconut Milk

In a saucepan, combine 220ml coconut milk and 150g granulated sugar. Heat over medium-low heat, stirring constantly, until the sugar completely dissolves. Remove from heat.

Step 3: Infuse with Pandan Flavor

Let the coconut milk and sugar mixture cool down. Once cooled, add 50ml pandan leaf extract and stir well to combine.

how-to-make-fragrant-pandan-banh-bo-4

Step 4: Sift Dry Ingredients

In a separate bowl, combine 280g tapioca starch, 30g rice flour, 5g baking powder, 1/4 teaspoon salt, and 1 packet vanilla sugar. Sift the mixture thoroughly to ensure it's very fine and lump-free.

how-to-make-fragrant-pandan-banh-bo-5

Step 5: Combine Wet and Dry Ingredients

Crack 7 chicken eggs into a bowl and lightly whisk them. Gradually add the cooled coconut milk-pandan mixture (from Step 3) to the eggs, stirring gently to combine. Slowly add the sifted dry ingredients (from Step 4) to the egg-coconut mixture, stirring gently until the flour is fully incorporated and the batter is smooth. Do not overmix.

how-to-make-fragrant-pandan-banh-bo-6

Step 6: Bake the Bánh Bò

Carefully pour the prepared batter (from Step 5) into the preheated baking mold. Place the mold into the oven and bake for 45 to 50 minutes, or until the Bánh Bò is cooked through and golden brown. A skewer inserted into the center should come out clean.

how-to-make-fragrant-pandan-banh-bo-1

Enjoy your homemade fragrant Pandan Bánh Bò!

No-Bake Coconut Bánh Bò Sandwich (Bánh Bò Kẹp Dừa) Recipe

Ever wondered about the calorie count of your favorite Vietnamese Bánh Bò? Or looking for a simple, no-oven method to make a delightful Bánh Bò Kẹp Dừa (Coconut Bánh Bò Sandwich)? This guide covers both, providing calorie insights and a convenient recipe for a delicious treat.

no-bake-coconut-banh-bo-sandwich-recipe-thumb

How Many Calories Are in Bánh Bò?

The calorie content of Bánh Bò can vary depending on the ingredients and specific type. Generally, a typical 100g serving of Bánh Bò contains approximately 82.9 calories.

Breakdown of calories in a standard 100g Bánh Bò:

  • 10g rice flour: ~36.5 calories
  • 2 tbsp palm sugar: ~40 calories
  • 5g tapioca starch: ~6.4 calories

Calorie variations by Bánh Bò type (per 100g):

  • Palm Sugar Bánh Bò (Bánh Bò Thốt Nốt): ~120 calories
  • Coconut Milk Bánh Bò (Bánh Bò Cốt Dừa): ~90 calories
  • Baked Coconut Bánh Bò (Bánh Bò Dừa Nướng): ~110 calories
no-bake-coconut-banh-bo-sandwich-recipe-4

No-Bake Coconut Bánh Bò Sandwich (Bánh Bò Kẹp Dừa) Recipe

Enjoy this quick and easy Bánh Bò recipe that doesn't require an oven! Perfect for a simple dessert or snack.

  • 1 chicken egg
  • 200g all-purpose flour
  • 180ml cold water or pandan leaf juice (for green color and aroma)
  • 40ml coconut milk
  • 50g granulated sugar
  • 1/2 teaspoon baking soda
  • 2/3 teaspoon instant dry yeast
  • Young shredded coconut (for filling)
  • Condensed milk (for filling)
  • Granulated sugar (for filling)
no-bake-coconut-banh-bo-sandwich-recipe-2

Step-by-Step Instructions for No-Bake Coconut Bánh Bò Sandwich:

Step 1: Activate the Yeast
In a small bowl, combine 2/3 teaspoon instant dry yeast, 25ml warm water, and a pinch of granulated sugar. Stir gently and let it sit for 10 minutes until the yeast is foamy and activated.

Step 2: Prepare and Ferment the Batter
In a large bowl, whisk 1 chicken egg and 50g granulated sugar until dissolved. Add 180ml cold water (or pandan leaf juice for flavor/color) and 40ml coconut milk, stirring to combine. Gradually add 200g all-purpose flour and 1/2 teaspoon baking soda, whisking until the batter is smooth and free of lumps. Finally, pour in the activated yeast mixture and stir well. Cover the bowl with plastic wrap and let the batter rise for 50 minutes until it doubles in size. Before cooking, give the risen batter a good stir.

Step 3: Cook the Bánh Bò on the Pan
Place a non-stick pan on the stove (do not preheat the pan). Pour a thick layer of batter onto the pan, about 1/3 of a finger joint in thickness. Cover with a lid and set the heat to the lowest possible setting. Cook until the surface of the cake appears dry, indicating it's cooked through. Gently remove the cooked Bánh Bò and repeat the process for the remaining batter.

no-bake-coconut-banh-bo-sandwich-recipe-3
no-bake-coconut-banh-bo-sandwich-recipe-1

Step 4: Assemble the Coconut Bánh Bò Sandwich
Spread a thin layer of condensed milk on one Bánh Bò piece. Sprinkle with granulated sugar and generous amounts of young shredded coconut. Place another Bánh Bò piece on top to form a sandwich. Slice into desired portions.

Enjoy your homemade No-Bake Coconut Bánh Bò Sandwiches!

Thứ Tư, 21 tháng 5, 2025

Authentic Vietnamese Bánh Bò Thốt Nốt - Oven Recipe

Discover how to make the traditional Vietnamese Bánh Bò Nướng, a delightful baked rice cake featuring the unique sweetness of palm sugar and rich coconut milk. This recipe guides you through creating a tender, aromatic Bánh Bò right in your own oven. Perfect for family gatherings or a sweet treat!

authentic-vietnamese-banh-bo-thot-not-oven-recipe-thumb

Ingredients for Baked Bánh Bò Thốt Nốt (Serves 4):

  • 240g tapioca starch
  • 360g palm sugar
  • 500ml coconut milk
  • 6g egg (approximately 1 small chicken egg)
  • 9g rice flour
  • 9g baking powder
  • 9g baking soda
authentic-vietnamese-banh-bo-thot-not-oven-recipe


Step-by-Step Instructions for Baked Bánh Bò Thốt Nốt:

Step 1: Create the Palm Sugar Caramel Base

Combine 360g palm sugar and 30ml coconut milk in a pot. Cook over medium heat, stirring continuously until the sugar fully dissolves and transforms into a rich caramel color. This step is crucial for the cake's distinctive flavor and color.

Step 2: Prepare the Coconut Milk Mixture

Remove the pot from heat. Gradually pour in the remaining 470ml coconut milk, stirring diligently until it's well incorporated with the caramel. Allow this mixture to cool completely before proceeding.

Step 3: Combine and Ferment the Flours

Sift 240g tapioca starch and 9g rice flour into the cooled coconut milk-caramel mixture. Whisk thoroughly until the batter is smooth and free of any lumps. Cover and let the batter ferment at room temperature for approximately 90 minutes. This fermentation process is key to the cake's airy texture.

Step 4: Preheat Oven and Prepare Baking Mold

While the batter ferments, preheat your oven to 165°C (329°F). Lightly grease the inside of your baking mold with coconut oil. Place the greased mold into the preheated oven for about 10 minutes to ensure it's hot when the batter is added, promoting even baking.

Step 5: Whisk the Egg

Crack 6g of egg into a fine-mesh sieve. Gently whisk the egg until it is smooth and completely beaten.

Step 6: Incorporate Leavening Agents into Egg

Add 9g baking powder and 9g baking soda to the whisked egg. Stir well until all leavening agents are fully dissolved and combined with the egg.

Step 7: Blend Egg Mixture with Fermented Batter

Strain the egg mixture once more through a sieve to eliminate any potential lumps. Slowly pour this smooth egg mixture into the fermented flour batter from Step 3. Gently fold until all ingredients are thoroughly combined, being careful not to overmix.

Step 8: Bake Your Bánh Bò

authentic-vietnamese-banh-bo-thot-not-oven-recipe-1


Pour the prepared Bánh Bò batter into the preheated baking mold. Place the mold into the oven, set to 160°C (320°F), and bake for approximately 50 minutes. To test for doneness, insert a wooden skewer into the center of the cake; if it comes out clean, your Bánh Bò is perfectly baked.

Enjoy this delightful and authentic Vietnamese Bánh Bò Thốt Nốt - Oven Recipe!

Thứ Sáu, 7 tháng 2, 2025

Công thức làm cupcake castella bông xốp mềm mịn

Cách làm bánh bông lan castella thông thường, bột sẽ được đổ vào một cái khuôn hình chữ nhật lớn, sau đó nướng trong lò và cắt bánh thành những hình chữ nhật dài.

Tuy nhiên ngày càng có nhiều biến thể và cách làm bánh bông lan phô mai Nhật Bản castella độc đáo và dễ thương hơn như cách làm cupcake castella mà Bếp Bánh chia sẻ dưới đây.

cong-thuc-lam-cupcake-castella-bong-xop-1


Nguyên liệu làm cupcake castella bông xốp mềm mịn

  •  2 quả trứng
  •  65g đường
  •  10ml mật ong
  •  2ml tinh chất vani
  •  25g bơ lạt
  •  25ml sữa
  •  80g bột mì
  •  2g baking powder
cong-thuc-lam-cupcake-castella-bong-xop-2

Cách  làm cupcake castella bông xốp mềm mịn

Bước 1: Cho vào âu 2 quả trứng, đặt trên nồi nước nóng trộn đều. Cho 65g đường, 10ml mật ong, 2ml tinh chất vani trộn đều. Đến khi nhiệt độ trong tô đạt 40 độ thì lấy xuống.

Bước 2:  Cách thủy bát khác gồm 25g bơ lạt, 25ml sữa trên nồi nước nóng để làm tan chảy.

Bước 3: Đánh bông hỗn hợp trứng, đánh 3p với mức cao, 1p30s với mức trung và 2p cho mức thấp nhất.

Bước 4: Rây vào 80g bột mì, 2g baking powder vào hỗn hợp trứng trộn đều.

cong-thuc-lam-cupcake-castella-bong-xop-3

Bước 5: Múc 1 ít bột vào hỗn hợp bơ sữa đã tan chảy trộn đều trước. Rồi mới cho tất cả vào chung trộn đều.

Bước 6: Cho bột vào khuôn cupcake đã được lót giấy cupcake. Đem nướng ở lò đã được làm nóng trước, nướng ở nhiệt độ 170 độ C trong 20p.

cong-thuc-lam-cupcake-castella-bong-xop-4

Chúc các bạn thành công!!!

Bánh da lợn tím cẩm nhân khoai môn dẻo ngon không cứng

Cách làm bánh da lợn tím cẩm nhân khoai môn dai, dẻo ngon, không bị cứng.

banh-da-lon-tim-cam-nhan-khoai-mon-deo-thumb

Nguyên liệu làm bánh da lợn tím cẩm nhân khoai môn

  • 400g lá cẩm
  • 650ml nước lọc
  • 300g khoai môn
  • 500g bột năng
  • 330g bột gạo
  • 650ml nước cốt dừa
  • 960ml nước lọc
  • 750g đường
  • 2mcf muối
  • 1 muỗng canh dầu ăn
banh-da-lon-tim-cam-nhan-khoai-mon-deo

Cách làm bánh da lợn tím cẩm nhân khoai môn dai ngon

Bước 1:  Trộn bột làm bánh da lợn tím cẩm

- Cho 400g lá cẩm vào nồi nấu với 650ml nước lọc sẽ thu được phần nước lá cẩm màu tím đậm.

- Sau đó lấy phần nước lá cẩm này trộn với 300g bột năng, 100g bột gạo, 400g đường, 1 muỗng cà phê muối và 1 muỗng canh dầu ăn, khuấy thật đều để tất cả các nguyên liệu tan ra.

Bước 2: Cách làm lớp bột khoai môn bánh da lợn tím cẩm

- 300g khoai môn  đem đi luộc chín rồi cho vào máy xay nhuyễn hoặc dùng rây nghiền nhuyễn phần khoai môn này.

- Tiếp đến  cho khoai môn đã xay nhuyễn cùng tất cả các nguyên liệu còn lại gồm 230g bột gạo, 200g bột năng, 350g đường, 1 muỗng cà phê muối và 650ml nước cốt dừa vào 960ml nước lọc, khuấy hỗn hợp cho thật đều.

Bước 3: Cách hấp bánh da lợn tím cẩm nhân khoai môn

- Cho nước vào xửng hấp rồi đun sôi và quét một lớp dầu ăn vào khuôn bánh, sau đó đổ hỗn hợp lá cẩm và hỗn hợp khoai môn ra từng chén nhỏ.

- Khi nước đã sôi thì  đổ một chén bột lá cẩm vào trước và hấp 15 phút, khi lớp lá cẩm đã chín thì  đổ tiếp vào lớp bột khoai môn rồi tiếp tục hấp trong 15 phút.

- Tiếp tục đổ xen kẽ các lớp bột vào và hấp như vậy cho đến khi đầy khuôn và lớp lá cẩm là lớp ngoài cùng. Dùng que tăm đâm vào bánh thấy bánh không bị dính tức là bánh đã chín, khi đó  có thể lấy bánh ra cắt thành từng miếng nhỏ vừa ăn.

Chúc các bạn thành công!!!

Chủ Nhật, 2 tháng 2, 2025

Cách làm bánh castella socola - Chocolate Castella

Thật thiếu sót nếu không chia sẻ cho các baker cách làm bánh bông lan Đài Loan castella socola mềm mịn, mùi hương thơm nồng,  dư vị ngọt - đắng từ chocolate và cacao.

cach-lam-banh-castella-socola-chocolate-castella-thumb

>>> Cách làm bông lan phô mai sầu riêng - Durian Castella
>>> Cách làm Castella trà xanh bông lan Đài Loan vị trà xanh
>>> Cách làm bánh Castella sữa chua chanh chua ngọt dịu dậy vị

Nguyên liệu làm bánh castella socola - Chocolate Castella

  • 50g chocolate đen
  • 80g bơ lạt
  • 100g sữa tươi
  • 90g bột số 8
  • 10g Bột cacao
  • 6 lòng đỏ trứng gà
  • 5g Tinh chất vani
  • 1g Muối
  • 6 lòng trắng trứng gà
  • 110g đường
cach-lam-banh-castella-socola-chocolate-castella-6

Cách làm bánh castella socola - Chocolate Castella

Bước 1: Cách thủy chocolate

cach-lam-banh-castella-socola-chocolate-castella-1

- Dùng dao cắt vụn 50g chocolate đen.

- Cho vào tô socola 80g bơ lạt, 100g sữa tươi, sau đó đem đi hấp cách thủy, khuấy đều cho hỗn hợp hòa quyện.

Bước 2: Trộn bột làm bánh castella socola - Chocolate Castella

cach-lam-banh-castella-socola-chocolate-castella-2

- Rây mịn vào tô chocolate 90g bột làm bánh, 10g bột cacao rồi dùng phới khuấy đều.

- Cho thêm 6 lòng đỏ trứng gà, 5g tinh chất vani, 1g muối và tiếp tục khuấy đều.

- Lọc hỗn hợp qua rây cho mịn mượt, bọc kín bằng màng bọc thực phẩm rồi đặt lên nồi nước ấm khoảng 50 độ C trong 7 - 10 phút.

Bước 3: Đánh bông lòng trắng trứng làm bánh bông lan

cach-lam-banh-castella-socola-chocolate-castella-3

- Cho 6 lòng trắng trứng vào tô lớn, dùng máy đánh trứng đánh ở tốc độ thấp đến khi trứng nổi bọt khí như xà phòng.

- Chia 110g đường làm 3 phần, từ từ cho từng phần một vào đánh cho tan. Đánh tan mỗi phần đường khoảng 30s ở tốc độ thấp sau đó mới cho phần đường tiếp theo vào đánh. Khi cho phần đường cuối cùng vào trứng bật máy đánh ở tốc độ cao, đánh trứng đến khi trứng bông mềm, có vân kem, hỗn hợp dẻo, bóng và mịn. Nhấc phới tạo chóp đứng nhưng oặt xuống là đạt.

Bước 4: Trộn bột với lòng trắng trứng làm bánh bông lan castella

cach-lam-banh-castella-socola-chocolate-castella-4

- Chia lòng trắng trứng đã đánh bông thành ba phần. Cho một phần bông kem vào hỗn hợp chocolate sau đó dùng phới lồng khuấy nhẹ nhàng cho tất cả nguyên liệu hòa quyện vào nhau.

- Cho hỗn hợp vừa khuấy được vào ngược lại tô lòng trắng trứng, dùng phới dẹt trộn nhẹ nhàng hỗn hợp theo chiều từ dưới lên trên. Đưa phới xuống dưới đáy âu, đẩy nguyên liệu nặng lên và hất sang một bên theo kiểu fold. Tiếp tục thao tác đến khi hỗn hợp trở nên mịn mượt.

Bước 5: Đổ khuôn và nướng bánh castella socola - Chocolate Castella

cach-lam-banh-castella-socola-chocolate-castella-5

- Lót giấy nến và đổ hỗn hợp bột vào khuôn, dùng tay đập nhẹ khuôn xuống bàn để làm vỡ các bọt khí lớn.

- Làm nóng lò ở nhiệt độ 150 độc C trong 5 phút, sau đó cho bánh vào nướng cách thủy 35 phút.

- Khi hết 35 phút, giảm nhiệt độ lò xuống 120 độ C và nướng thêm 40 phút.

Chúc các bạn thành công!!!

Thứ Năm, 22 tháng 8, 2024

Cách làm bánh trung thu bánh nướng nhân cốm dừa

Cách làm bánh trung thu nhân cốm dừa cứ đến mùa thu là lại rộn ràng, chỉ cần chớm có cốm non là các chị em đã mách nhau làm cốm xào và làm bánh trung thu nhân cốm.

Bếp Bánh đã chia sẻ công thức làm bánh dẻo nhân cốm dừa rồi, hôm nay tiếp tục đến công thức làm bánh nướng nhân cốm xào để các mẹ vào bếp làm bánh cúng rằm nha!!!

cach-lam-banh-trung-thu-banh-nuong-nhan-com-dua-2

Nguyên liệu làm bánh trung thu bánh nướng nhân cốm dừa

Nguyên liệu làm nhân cốm (cho khoảng 680g nhân thành phẩm)

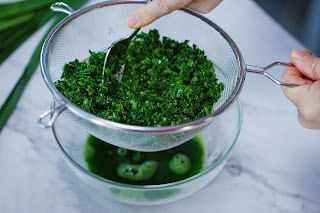
  • 90g nước lá dứa (xay 15g lá dứa với 150g nước, lọc lấy 90g nước cốt)
  • 300g cốm tươi, bóp tơi
  • 60g dừa nạo sợi dài
  • 50 - 60g đường
  • 100g nước cốt dừa
  • 20g dầu ăn
  • ⅛ tsp tinh chất lá dứa có màu (không bắt buộc)
  • 40g bột bánh dẻo

Nguyên liệu làm vỏ bánh nướng trung thu

  •  240g bột mì đa dụng
  •  160 nước đường
  •  1 lòng đỏ trứng gà (18 - 20g)
  •  30g dầu ăn

Nguyên liệu hỗn hợp quét mặt bánh

  •  1 lòng đỏ trứng
  •  ½ thìa cafe sữa tươi không đường
  •  ½ thìa cafe dầu ăn
cach-lam-banh-trung-thu-banh-nuong-nhan-com-dua-1

Cách làm bánh trung thu bánh nướng nhân cốm dừa

Cách xào cốm dừa làm nhân bánh trung thu nhân cốm dừa

Bước 1. Ướp dừa với đường trong khoảng 30 phút tới khi dừa trong lại.

Bước 2. Cho tất cả nguyên liệu (trừ bột bánh dẻo) vào trộn cùng nhau, để nghỉ 15 phút.

Bước 3. Xào nhân cốm trên lửa vừa cho tới khi cốm mềm, quyện thành khối dẻo thì bắc chảo khỏi bếp, để nguội bớt.

Bước 4. Chia bột bánh dẻo thành 2-3 phần, cho từng phần vào nhào cùng cốm. Bọc kín mặt nhân, để nguội hoàn toàn rồi để lạnh khoảng 2 giờ.

Cách làm vỏ bánh nướng - cách làm vỏ bánh trung thu

Bước 5.  Rây mịn bột mì vào âu, dùng thìa vét bột, tạo một lỗ trống ở giữa âu, cho lần lượt các nguyên liệu còn lại vào phần trống. Rồi nhẹ nhàng dùng thìa quấy đều theo vòng tròn hay xoắn ốc từ phần chất lỏng ở giữa ra ngoài, để bột khô dần hòa quyện với các nguyên liệu còn lại.

Bước 6.  Quấy đến khi các nguyên liệu hòa quyện thì dùng tay nhẹ nhàng nhào đều để bột tạo thành một khối mịn dẻo và đồng nhất. Bột mới trộn xong sẽ hơi ướt một chút. Nếu bột khô và bở, có thể bẻ vụn dễ dàng, nên thêm dầu ăn hoặc nước đường.

Bước 7.  Dùng nilon bọc thực phẩm hoặc giấy nến nướng bánh bọc kín cả khối bột để bột không bị khô. Để bột nghỉ ở nhiệt độ phòng trong khoảng 30 – 45 phút.

Bước 8. Chia nhân và vỏ bánh nướng nhân cốm dẻo,  với bánh 150g: 80g nhân - 70g vỏ. Riêng với bánh cốm, nên làm vỏ và nhân theo tỉ lệ 1:1, không làm vỏ quá mỏng bánh sẽ không giữ được nhân, làm bánh bị sệ nhiều và lưu ý  không đóng bánh quá cao. Đóng bánh thành hình.

Bước 9. Làm hỗn hợp quét mặt: đánh tan toàn bộ nguyên liệu đã chuẩn bị. Dùng chổi quét nhẹ nhàng hỗn hợp lên bề mặt bánh.

cach-lam-banh-trung-thu-banh-nuong-nhan-com-dua-3

Bước 10. Cách nướng bánh trung thu - Bánh nướng nhân cốm dừa

- Nướng bánh trung thu nhân cốm dẻo lần 1: 190 độ, thời gian 13-15', bánh chín lấy ra xịt nước cho nguội bớt, dùng chổi quét nhẹ nhàng hỗn hợp lên bề mặt bánh.

- Nướng bánh trung thu nhân cốm dẻo lần 2: 180 -190 độ, thời gian 10-12', bánh chín lấy ra xịt nước cho nguội bớt, dùng chổi quét nhẹ nhàng hỗn hợp lên bề mặt bánh.

 Để bánh trong túi kín có hút ẩm, dùng trong 2 - 3 ngày. Không để lâu hơn tránh việc bị lại cốm 

Chúc các bạn thành công!!!


Bếp Bánh Template by Ipietoon Cute Blog Design